Embroidery Photoshop Action: A Designer Review
As an embroidery designer who manages both custom client orders and a digital shop on Etsy, my workflow often bridges the gap between digitizing software and graphic presentation tools. When I first encountered the Embroidery Photoshop Action on Creative Fabrica, I was skeptical. Usually, "embroidery effects" in graphic design software result in flat, unrealistic textures that mislead customers about what a machine embroidery design actually looks like. However, after integrating this tool into my pre-production and marketing workflow for a recent batch of custom sweatshirts and tote bags, I found it serves a distinct purpose for creative entrepreneurs.
This review evaluates the Embroidery Photoshop Action not as a digitizing replacement, but as a vital asset for visualization, mockup creation, and multilingual design planning. Whether you are selling digital embroidery files or finished handmade products, understanding how this action performs in real-world scenarios is essential before adding it to your design arsenal.
First Impressions: Visual Texture and Stitch Personality
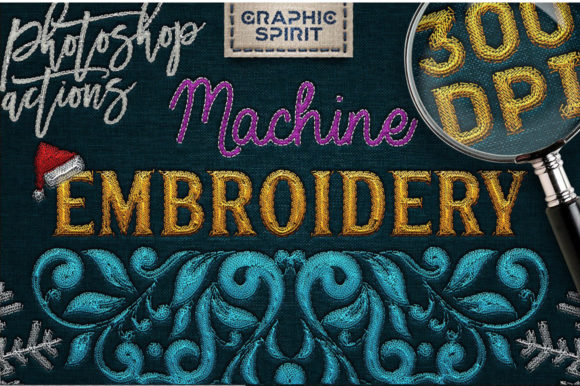
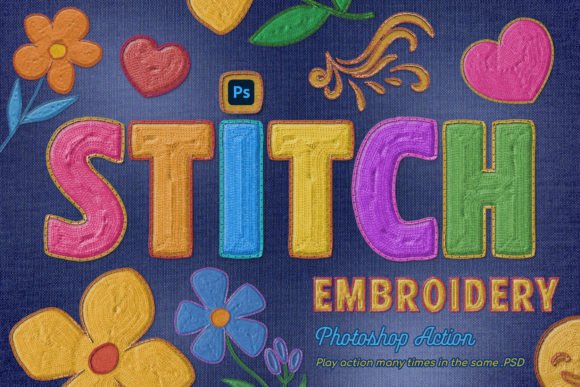
Upon loading the action into Photoshop, the immediate standout feature is the texture rendering. Unlike generic filters, this action attempts to mimic the directional flow of thread. For a designer, this matters because satin stitch columns reflect light differently than fill stitch areas. The action respects these differences reasonably well, creating a visual hierarchy that helps me decide if a design element needs adjustment before I ever open my digitizing software.
The product description highlights that this is a multilingual action compatible with PC and Mac. In my testing, I used it to visualize text-heavy designs for a bilingual wedding gift project. The ability to play the action multiple times within the same PSD file allowed me to layer English and Spanish text elements without flattening the image prematurely. This flexibility is crucial when creating personalized gifts where typography placement is just as important as the decorative motifs.
Real-World Application: From Screen to Hoop
I tested this action specifically while preparing listings for embroidered sweatshirts and canvas tote bags. My goal was to create accurate printable mockups that represented the final commercial embroidery output without stitching ten different color variations.
Apparel and Custom Mockups
For sweatshirt embroidery, fabric texture can distort how a design appears in photos. The Embroidery Photoshop Action helped me visualize how high-contrast thread colors would pop against heather grey fleece versus black cotton. By applying the action to my vector artwork, I could identify potential density issues visually. If the simulated stitch density looked too heavy in the mockup, I knew to reduce the underlay or adjust the spacing in my actual embroidery file before production. This saved hours of test stitching on expensive blanks.
Tote Bags and Patches
When designing for unstructured items like tote bags or embroidered patches, scale is everything. I used the action to compose multiple colorful embroidery elements into a single layout. Because the action allows for repeated application, I could build a complex, multi-colored composition to see how the overall balance worked. This is particularly useful for sellers offering applique designs, as you can simulate the fabric overlay and stitching interaction to ensure the buyer understands the tactile nature of the finished product.
Practical Considerations for Small Business Owners
While this tool is powerful for graphics, it must be used with practical embroidery knowledge. It is a visualization aid, not a manufacturing guarantee. Here are specific considerations for using this action effectively in a business context:
- Hoop Size Awareness: The action does not know your machine’s limits. Always verify that your composed design fits within your available hoop size. A beautiful digital composition may require re-hooping or resizing in your digitizing software.
- Stabilizer Planning: Use the visual output to estimate stabilizer needs. If the action shows dense, layered elements, plan for cut-away stabilizer or topping for textured fabrics. The visual weight in Photoshop often correlates to physical weight on the garment.
- Thread Color Contrast: Digital RGB colors differ from rayon or polyester thread charts. Use the action to check contrast ratios, but always validate against physical thread samples. Dark fabric mockups generated by the action should be treated as a guide for placement, not an exact color match.
- Tiny Lettering Limits: Be cautious when simulating small text. The action may render tiny letters beautifully on screen, but physically, anything under 4mm height risks illegibility. Always cross-reference with standard embroidery legibility rules.
Enhancing Buyer Trust and Product Value
For Etsy sellers and digital product vendors, presentation drives sales. Customers need to trust that the digital embroidery file they are purchasing will yield professional results. Using the Embroidery Photoshop Action to create consistent, high-quality listing images establishes brand authority.
Instead of relying solely on flat screenshots from digitizing software, I now use compositions created with this action to show potential colorways and layout options. This increases customer engagement because buyers can visualize the custom apparel or home decor item in their preferred palette before purchasing. For those selling design assets, demonstrating the versatility of your files through varied, colorful compositions made possible by this action can significantly increase perceived value.
Furthermore, for makers attending craft fairs, this tool aids in creating professional signage and lookbooks. You can print high-resolution visuals of your handmade products that accurately represent the stitch texture, helping customers understand the craftsmanship involved even from a distance.
Critical Workflow Notes and Safety Checks
To get the most out of this Creative Fabrica embroidery resource while protecting your business reputation, adhere to these best practices:
- Always Test on Scrap Fabric: Never assume the digital simulation equals physical perfection. The action helps with aesthetics, but only a sew-out confirms structural integrity. Test on scrap fabric using the appropriate stabilizer before committing to a client order.
- Verify Licensing: Before selling any finished product or mockup created using this action, review the specific license terms on the Creative Fabrica product page. Ensure commercial use is permitted for your intended application.
- Check File Details: Confirm compatibility with your version of Photoshop. While listed as PC/Mac compatible, older versions may handle actions differently.
- Inspect Small Details Post-Stitch: After stitching a design planned with this action, inspect small details and running stitches. Compare the physical result to your digital mockup to calibrate your future expectations.
- Maintain Transparency: If using these mockups for digital file sales, consider noting that images are digital simulations. This manages buyer expectations regarding slight variations in actual stitch appearance.
Final Thoughts for Embroidery Professionals
The Embroidery Photoshop Action is a specialized tool that fills a niche between artistic concept and technical production. It excels at helping designers visualize multilingual compositions, plan colorful layouts, and create compelling marketing materials for commercial embroidery and handmade goods. It supports the creative side of our industry, allowing us to iterate faster and present our work more professionally.
However, it remains a supplement to, not a substitute for, solid digitizing skills and practical testing. For the Etsy seller needing better listing photos, the apparel decorator planning a capsule collection, or the digitizer wanting to preview color interactions, this action offers tangible value. Just remember that the true test of any machine embroidery design happens in the hoop, not on the screen. Use this tool to enhance your vision, but let your needle validate your quality.